
Here are basement finishing basics: When a basement if finished right, it’s a cheap way to create extra living space for those homeowners who don’t have a lot of room or money.
Because the shell of the space is already there — the empty unfinished space in the basement — finishing a basement usually has a much lower remodeling cost per square foot than adding an addition on the back of the house or a dormer on the attic of the house. So take care and follow the ABC’s of basement finishing listed below.
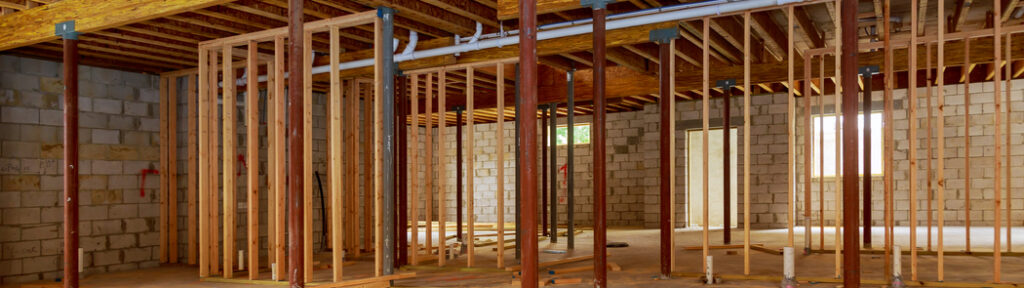
But there are some constraints with finishing a basement. Ceiling height can be a problem.
To make the basement living space comfortable, you need a ceiling height of about seven and one-half feet or more, with the ceiling dipping as low as six and one-half feet for beams, ductwork and pipes.
If the ceiling height is lower, It’s probably not a good idea to finish the basement.
Here are some other ideas and basement finishing basics that might interest you: The Top Ten Most Profitable Home Renovation Projects, and Top Five Interior Home Renovation Tips.
Another problem could be moisture. If you get water through the walls of your basement during heavy rains, you should have the basement walls waterproofed before finishing the space, which can costs several thousand dollars. You may also need to have a sump pump installed if the basement doesn’t have one.
Start by repairing or caulking any interior basement wall cracks and then sealing the walls with foundation sealers found at most home improvement stores. The sealers are applied like paint.
Walls of the finished basement space should be then framed out with two-by-four studs every 16 inches, and insulated with three and one-half inch fiberglass batts for an R-value of about 11.
Insulating the walls between the finished space and a utility area is also a good idea in that it will reduce the cold and also the noise generated by furnaces, boilers, water heaters and washers and dryers.
You should also place insulation in the spaces above the exterior wall between floor joists, and in any cavities surrounding windows.
In addition, the wall frames should be protected with a plastic vapor barrier on the warm side of the frame. The barrier will prevent moisture traveling from inside your house through the walls.
On the exterior side of the framing, a plastic moisture barrier should be installed, starting along the wall slightly above ground level. The plastic sheet should extend down to the floor and under the wall frame’s bottom plate, which should be a pressure-treated two-by-four stud.
The barrier will prevent any moisture that seeps through the exterior wall from damaging the insulation, the framing or the drywall.
You can glue the moisture barrier to the wall, or staple it to the outside of the wall frame before it’s attached to the basement wall.
The easiest way to attach the wall frame to the basement wall is with a nail gun and concrete nails. Frames can also be attached to ceiling joists.
Before constructing the wall frame, don’t forget to take into account any electrical conduit, speaker wires, or cable lines that need to run through the studs.
You can then finish the wall with half-inch drywall, which can be painted, or wood paneling. Wood and metal support posts that run through the middle of a basement can be masked as drywall columns and spruced up with baseboard and wood trim to look more aesthetically pleasing. To make the posts appear uniform, you can drill into the posts and attach wood shims or two-by-four to make them all the same size before attaching the drywall.
Drop ceilings are a good choice for basements. Drop ceilings are large ceiling tiles that fit into a grid system installed to the joists above. The advantage is that they allow access to the pipes and ductwork.
Glass block windows are a good choice to minimize the infiltration of cold air into a basement. Doors that lead to the outside, meanwhile, should be weatherstripped to prevent cold infiltration.
Finally, you’ll need to extend your home electrical system and heating system to accommodate the new basement space. That work, however, is best left to the professionals. So that’s it for the basement finishing basics. Good luck on your project.
© by Jim Sulski. All rights reserved.